
It will be the same size of Lila and Nancy. I like this size doll, they are 15 inches long and a good size for children. If you want to use this doll face on one of those patterns, you can. Eva's pattern will be made with clothes on because she is for a toddler. Her doll is named Betsy.


This facial embroidery pattern is simpler than Lila or Nancy because it uses fewer kinds of embroidery stitches. Here is the Embroidery Pattern for Lila & Nancy.

Now on to Eva! Here is the pattern to print. Print it at 100%, if you have a problem doing this here is a link to the PDF.

Materials:
Embroidery needles
Scissors
5" Embroidery Hoop
Embroidery Thread Colors:
Black for the Pupil
2 colors for the Iris
White for the Sclera
1 color matching your chosen hair color
2 colors for you lips, 1 light and a darker 1 of the same shade
1 skin tone color for the nose and under the eye
*Note I always worked with 2 strands of thread in my needle and knotted on the end. So, 4 threads were in every stitch.
I will lead you through the steps as I did them.
The Iris:
These are similar to the type of stitch I used:

I just put them close together and filled it in like this:

I just put them close together and filled it in like this:
However, I modified it by not stitching very much in the back. I had to do this because the amount of thread in that small area was dense enough to make it difficult to embroider otherwise. You will notice this change looking at the inside of the face's Iris.

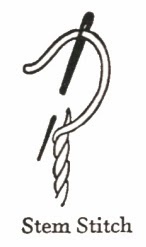
For the eyebrow & under the eye, I used the stem stitch.
For filling in the upper eyelashes, pupils, & sclera, I used a satin stitch.

For the nose, I used a split stitch.


For the mouth, I used a satin stitch again.

There are plenty of great tutorials on You Tube with these stitches if you need them. I recommend giving it a try. If you mess up, it's easy to fix or start over.
Who do you know that would love a doll made by you?
I would love to see any photos from your dolls. So, please send me a picture if you can!
Here are my hair tutorials for doll making:


Linked on Wow us Wednesday and these other parties I love!
Neat! I always wondered how those were done! Such great details and well done tutorial!
ReplyDeleteThank you! It was intimidating the first time I did it, but I found that it was not hard. It just takes a little time. :o)
DeleteThe dolls you make are SO cute!! Thank you for sharing this great tutorial with us at ShowLicious Craft and Recipe Party! :) I'm pinning this to the party board. :)
ReplyDeleteThanks Marti! I am glad you like them and thank you for hosting! :o)
DeleteSuch great tips and such a pretty dolls face. It's just so easy to get it a bit off and make a scary doll - your faces are always so cute (you know what I mean!)
ReplyDeleteThanks Julia! I am glad you don't find them scary! ;o) I have seen several examples of ppl using my patterns now and the weird thing to me is how they look exactly like the doll I made, but I didn't make it. It's almost surreal to me for some reason.
DeleteI love your dolls, Charlie -- they really look so sweet, and your embroidery is exquisite! Thanks for sharing! :)
ReplyDeleteThanks Dee! I don't feel that my embroidery is anything above basic. I can't even make a french knot! However, it's amazing how cute a couple of simple stitches can be. I think anyone with a desire to make it and an embroidery hoop to hold their fabric could do it.
DeleteWow! Thanks for wonderful tutorial I am going to practice some faces :-))
ReplyDeleteHave fun!
Delete