It's almost time for my God-daughter's birthday again. I wanted to make her a doll that was of a completely different sort than last year, but could still wear the clothes from Betsy's wardrobe. (There is a free pattern for Betsy and a tutorial for her hair as well.) Ellie is photographed here wearing Betsy's Reversible Dress:
I am making this tutorial differently than I have in the past. Instead of using a collage, I am going to write under each picture. I receive a fair amount of non-English speaking traffic and want my viewers to be able to have the post translated easily.
Materials:
1/4 yard of fabric
matching thread
black embroidery thread
needle
stuffing
scissors
Here is a PDF of the pattern.
These are the front pieces laid together. The front body piece, also has the underside of the trunk.
Start by sewing the three head pieces together. Sew up the center dart, as well.
Done. As you can see my first pattern draft did not have a center dart. Sometimes I revise my patterns in the process.
Pin the right side on the fabric head the the rightside of the front body piece with the trunk pieces together.
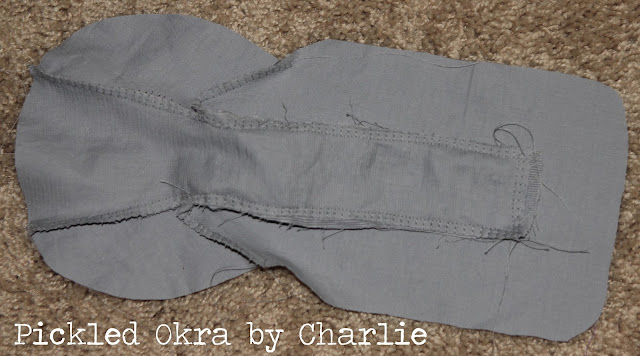
It will look like this once you have sewn the head to the body and the trunk is together.
For the ears: turn the pink fabric and the grey fabric right side to right side. Sew around the curve. Turn right side out, slightly fold down part of the ear, pin onto the head. Sew onto the edge. When you fold it back you see what it will look like on the body.
Sew around the edges of the arm and legs, stuff, sew to the edges on the body front piece. Make a small hole in the back bottom piece and sew in the tail. Sew up the darts on the back body piece.

Here is the body with the pieces unfolded. We're starting to see what Ellie will look like! Embroider the eyes on at this point, if you haven't yet. I used a 4 strands of black tread and did 6 stitches for the round eye and 1 stitch 3 times for the eyelashes.

Time to sew the 2 body pieces together. First sew around the head.
Second, tuck the arms in and sew down both sides of the body.
Third, tuck the legs inside of Ellie's body and sew the curves on the bottom edge together, leaving a 1.5" hole in the bottom.
Now it's time to turn your doll right side out. Start by ulling out the legs, then the arms head. Stuff the body from the hole and hand sew it shut. You are done!
Here's Ellie in the other side of the dress. Isn't she a darling!
I hope enjoy making Ellie. I would love to hear form you and take a look at your creations. So please comment and let me know how you used my patterns.


what size seam allowance?
ReplyDeletedid I miss the pattern piece for the tail? (I can figure that out but just wondering)
cute pattern
I do a quarter of an inch seam allowance and I forgot to put on the little piece for the tail. It will just be a little rectangle that you so with some grey embroidery floss hanging out of the end. Sorry about that!
DeleteThe link for the pattern is not working :'(
ReplyDelete